Category: Building A Home

  • How a Construction Loan to Permanent Mortgage Conversion Works

    If you are building a custom home or buying a new construction property, one of the most important financing questions is how a construction loan-to-permanent mortgage conversion actually works.

    Many buyers assume the process is automatic. Sometimes it is. Sometimes it is not. The answer depends on how the loan was structured before construction began.

    This is where confusion can get expensive. A buyer may understand the floor plan, builder contract, and construction timeline, but still miss the financing structure that controls what happens when the home is finished. That final step can affect your closing costs, interest rate, underwriting, appraisal, cash needed to close, and move-in timeline.

    Here is how the process works in plain English.

    What Construction Loan to Permanent Mortgage Really Means

    A construction loan is short-term financing used while a home is being built. The money is not usually handed over all at once. Instead, funds are released in stages as work is completed.

    During construction, payments are often interest-only. That means you are paying interest on the funds that have been drawn, not necessarily paying principal and interest the way you would on a normal mortgage.

    Once the home is complete and legally ready to occupy, the construction financing has to be resolved. It either converts into long-term mortgage financing or gets paid off by a new mortgage.

    That long-term mortgage is often called the permanent mortgage or the end loan.

    The structure matters because it tells you whether you have one or two closings, whether you need to qualify again, and how much risk you carry while the home is being built.

    The Two Main Construction Loan Structures

    Most buyers will encounter one of two loan types: a construction-to-permanent loan or a construction-only loan.

    A construction-to-permanent loan is often called a one-time close loan. With this structure, the construction loan and permanent mortgage are approved together at the beginning. You close once, construction begins, and the loan later converts into a permanent mortgage after the home is complete.

    That setup can feel cleaner because the permanent financing is already part of the plan. You are not starting over with a brand-new mortgage application after construction.

    A construction-only loan works differently. It only covers the build phase. When the home is done, that loan has to be paid off. Most buyers do that by getting a new mortgage. That second loan is the end loan.

    This can grant flexibility, but it also adds risk. If rates go up, your income changes, your credit shifts, or the final value does not come in where expected, the second closing may become more stressful than planned.

    Before Construction Starts

    The construction loan-to-permanent mortgage path begins before anyone breaks ground.

    At the start, the lender is looking at more than your income and credit. They also want to understand the project itself. That usually means reviewing the building plans, construction budget, builder contract, timeline, land value, and estimated completed value.

    This is one reason construction financing feels different from buying an existing home. With a resale home, the lender can review a property that already exists. With a build, the lender is approving a home that is still on paper.

    That makes the early planning stage more important. If the budget is too thin, the builder contract is vague, or the land has unresolved approval issues, the financing can become harder to manage later.

    Buyers should also pay attention to how cost overruns will be handled. Many lenders do not simply increase the loan because materials, labor, or site work came in higher than expected. In many cases, the borrower has to cover the difference.

    During Construction: Draws and Interest-Only Payments

    Once the construction loan closes, funds are released through draws.

    A draw is a staged release of money tied to construction progress. Common milestones may include site work, foundation, framing, dry-in, rough plumbing and electrical, drywall, finishes, and completion.

    Before a draw is released, the lender usually wants verification that the work has been completed. That may involve a draw inspection, photos, lien documentation, invoices, or other paperwork, depending on the lender and project.

    This protects the lender because the property is the collateral. It also protects the borrower from having to pay in advance for work that has not been done.

    During this phase, the monthly payment can change. Early in the build, only a small portion of the loan may have been drawn, so that the interest-only payment may be lower. As construction continues and more funds are released, the balance increases, possibly resulting in to a higher payment.

    That can catch buyers off guard if they are also paying rent, carrying another mortgage, or managing storage and moving costs during the build.

    What Has to Happen Before the Loan Converts

    A construction loan-to-permanent mortgage conversion does not usually happen just because the builder says the house is done.

    The lender needs proof that the project is complete enough to support permanent financing. That usually means the home has passed final inspections, the local jurisdiction has issued a Certificate of Occupancy or equivalent approval, and the property is legally habitable.

    The lender may also require a final appraisal update or completion report. This confirms that the finished home is consistent with the plans and assumptions used earlier in the loan process.

    Lien waivers may also matter. The lender wants to know that contractors, subcontractors, and suppliers have been paid properly so the permanent mortgage is not at risk from construction-related lien claims.

    This is the point where paperwork, inspections, title, appraisal, and local approval all come together. If one piece is missing, the conversion or end-loan closing can be delayed.

    Path 1: One-Time Close Conversion

    With a one-time close loan, the process is usually more predictable.

    The borrower closes before construction begins. The construction phase is temporary. Once the home is complete and the lender has the required documentation, the loan converts into its permanent structure.

    That does not mean nothing can change. Some loan terms may still be modified before conversion, depending on the program and lender guidelines. The interest rate, loan amount, loan term, or amortization type may be reviewed or adjusted in certain situations.

    Still, the main advantage is that the buyer is not usually starting from zero at the end of construction. The permanent mortgage was already part of the earliest structure.

    For buyers who want fewer moving pieces, this can be appealing.

    Path 2: Two-Time Close and the End Loan

    With a construction-only loan, the final step is a new mortgage.

    This is where the end loan comes in. The end loan pays off the construction loan and becomes the long-term mortgage on the completed home.

    The trade-off is that the buyer usually has to go through another approval process. That may involve updated credit, income, assets, employment, appraisal, title work, and closing disclosures.

    This structure can work well in the right situation, especially if the buyer wants more flexibility in choosing the permanent lender. The risk is timing. Months may pass between the first construction closing and the final mortgage closing. A lot can change during that time.

    Rates can move. Income can change. The debt-to-income ratio can shift. The finished home may appraise lower than expected. A buyer who looked strong at the beginning may face a tighter approval later.

    Risks Buyers Should Plan For

    The construction-to-permanent loan process has a few common pressure points.

    Construction delays are one of the biggest. If the loan is structured around a 12-month construction period and the project runs long, the borrower may face extension fees, additional interest, modified documentation, or a more complex conversion.

    Cost overruns are another issue. Site work, material changes, utility extensions, weather delays, and change orders can all push the project beyond the baseline budget. If the lender does not increase the loan amount, the buyer needs cash to keep the project moving.

    Appraisal shortfalls can also create problems. If the completed home does not appraise high enough, the loan-to-value numbers may not work as expected. That may result in additional cash needed at closing or changes to the loan structure.

    The last risk is a change in personal finances. New credit cards, car loans, job changes, lower income, or higher monthly debt can all affect approval if the borrower has to qualify again.

    What Buyers Should Ask Early

    Before choosing a loan structure, buyers should ask direct questions.

    Will this be a one-time close or a two-time close?

    Does the loan automatically convert when construction is complete?

    Will I have to qualify again?

    How are draw inspections handled?

    What happens if construction runs late?

    Who pays for overruns?

    What documents are needed before conversion?

    What happens if the final appraisal comes in low?

    These questions are not just lender questions. They affect the real estate side of the project, too. Land, builder selection, design decisions, budget, approvals, and financing all have to work together.

    How This Fits Into a Boise or Treasure Valley Build

    For buyers building in Boise, Meridian, Eagle, Kuna, Nampa, Caldwell, or other parts of the Treasure Valley, the financing structure should never be treated as separate from the property itself.

    A beautiful lot can still create financing pressure if site work is expensive, utilities are harder than expected, approvals take longer, or the final build cost rises. The best plan is the one where the land, design, builder, and loan structure make sense together.

    That is exactly where Sunrise Realty Group’s approach matters. Mike Carroll works at the intersection of real estate, land, design, and new construction planning, helping buyers ask better questions before they are deep into a project.

    Final Takeaway

    A construction loan-to-permanent mortgage conversion is the bridge between building the home and owning it with long-term financing.

    If you choose a construction-to-permanent loan, the loan may convert after completion once the lender has the required documentation. If you choose a construction-only loan, you will likely need a new end loan to pay off the construction financing.

    Neither structure is automatically better for everyone. The right choice relies on your risk tolerance, cash position, timeline, lender options, and your trust in the project budget.

    Before you buy land, choose a plan, or commit to a builder, make sure you understand how the financing ends. The finish line is not just the day construction wraps. It is the day the home is approved, funded, closed, and ready for you to live in.

    Planning a New Build in Idaho?

    Sunrise Realty Group helps buyers think through the real estate side of building before the process gets expensive. From land and construction plans to builder coordination and move-in planning, the goal is to keep the project clear, realistic, and aligned from the beginning.

    If you are planning a custom home or new construction purchase in Boise or the Treasure Valley, Contact Sunrise Realty Group to discuss the following steps before you commit.
    Learn how a construction loan to permanent mortgage conversion works, including draws, inspections, end loans, appraisals, and closing risks.

  • Fire and Environmental Reviews in Idaho: Non-Negotiable Building Approvals

    Part 5 of the Series: How the Building Approval Process Actually Works in Idaho

    By the time a project reaches fire and environmental reviews in Idaho, it may seem as if the hard parts are finished. Zoning may be resolved. The lot may be a legal buildable lot. Engineering, drainage, access, and utilities may appear workable.

    That is why this stage can surprise buyers, landowners, and builders.

    Fire authorities and environmental health reviewers are not focused on resale value, design preferences, convenience, or sunk costs. Their job is narrower and stricter: protect life, public health, emergency access, water quality, and the surrounding land.

    A project can be properly zoned, meticulously designed, and ultimately stalled. Why would it be stalled? Well, maybe because a fire engine cannot reach the structure, the water supply cannot support fire response, the septic system cannot be approved, or the site creates environmental risk.

    What Fire and Environmental Reviews in Idaho Actually Decide

    Fire and environmental reviews in Idaho may happen during or after other technical reviews. The timing depends on the city, county, fire district, and type of project.

    No matter when the review happens, the main question is simple: can this project be built, accessed, and used without creating a serious safety or environmental risk?

    These reviews may involve fire districts, fire marshals, environmental health departments, public health districts, floodplain administrators, stormwater reviewers, and state agencies such as the Idaho Department of Environmental Quality.

    These agencies commonly operate separately from planning and zoning. A planning department may say the use is allowed. Engineering may say the road or drainage plan can be conditioned. But none of that forces fire or environmental reviewers to approve a site that fails their standards.

    Fire Authority Review Starts With Emergency Access

    The fire review begins with a straightforward question: Can emergency responders reach the structure safely and quickly enough to do their job?

    That question affects more than the driveway. Fire reviewers may look at road width, surface material, slope, turning radius, bridge capacity, gate access, address visibility, turnaround design, and dead-end road length. A driveway that feels usable to a homeowner may not be usable by a fire apparatus.

    This matters most on rural acreage, hillside parcels, flag lots, long private drives, and properties served by older roads. These sites might look peaceful during a showing, but a fire reviewer is considering other important factors in a crisis situation, such as response time, vehicle weight, winter conditions, and team safety.

    Sometimes the fix is simple, such as widening an approach or adding a turnaround. Other times, it requires road improvements, easement work, bridge documentation, or a redesigned site plan.

    Fire Flow and Water Supply Can Change the Whole Project

    Fire flow is one of the most serious review issues because it determines whether enough water is available for fire suppression.

    On a city lot, that may involve hydrant spacing, system pressure, and water main capacity. On a rural site, it may involve wells, storage tanks, cisterns, or other approved water-supply systems. The question is not whether water exists nearby. The question is whether the available supply meets the applicable fire authority’s requirements for the proposed structure and location.

    If the fire flow is inadequate, the project may need changes. The authority may require sprinklers, additional water storage, hydrant improvements, a different road layout, or cooperation with the water provider. The cost of solving the fire flow problem can affect whether the project still makes financial sense.

    This is also where the review process begins to affect the land’s real value. A lot can have great views, privacy, and plenty of appeal, but if fire access is weak or water supply is limited, those issues can add major costs.

    Remember, a fire tank, road upgrade, sprinkler system, or utility extension can quickly change the budget.

    Wildland-Urban Interface Rules Are Easy to Underestimate

    In Idaho, wildfire risk can be incorporated into the building process when a property sits near foothills, timber, grassland, or the rural edge of a community. If the land falls within a wildland-urban interface area, the project may have to meet stricter rules for the site plan, building materials, vegetation, and defensible space.

    WUI requirements can change practical parts of the build, including the roof, siding, vents, decks, windows, fencing, eaves, chimneys, landscaping, and the space closest to the house.

    That level of detail is important in fire-prone areas. Windblown embers, dry brush, and limited entry can make any home much harder to protect. The goal is to reduce the places a fire can catch and make the property safer for crews to defend.

    This surprises buyers who assume WUI compliance is mostly about just clearing brush. In reality, it may influence construction details and long-term maintenance. A design that works on your average, typical subdivision lot may need to be modified when the parcel is in a higher-risk fire area.

    Environmental Review Focuses on Health, Water, and Long-Term Damage

    Environmental reviewers look for risks that may not be obvious during a property tour. Soil, water, wastewater, drainage, contamination, and sensitive natural areas can all affect whether the site can be developed as planned.

    For many land buyers, septic approval is the biggest hurdle. If municipal sewer is unavailable, the property has to support an approved onsite wastewater system. Reviewers may evaluate soil type, percolation, groundwater depth, setbacks from wells and surface water, slope, drainfield location, reserve drainfield area, and whether an alternative system is needed.

    Acreage can be misleading. A parcel may look large enough on paper, but septic approval depends on what is happening underground and around the site. Poor soils, shallow groundwater, steep slopes, drainage issues, or setback conflicts can all limit where a system can go. In some cases, the land simply will not support the setup that a buyer expected.

    Floodplain, Drainage, and Stormwater Issues Also Matter

    Fire and environmental reviews in Idaho can also involve floodplain and stormwater concerns. A property near a creek, canal, river, drainage path, wetland, or low-lying area may need more review than the listing suggests.

    Floodplain rules may require elevation data, engineered certifications, special construction standards, or limits on where structures can be placed. Drainage review, however, may focus on where runoff goes after the site is graded. It may also cover how disturbed soil is managed during construction, and whether nearby properties or waterways could be affected.

    Construction stormwater is especially important on larger disturbed sites or projects that are part of a broader development plan. Reviewers want erosion control, sediment control, pollution prevention, and site stabilization handled before damage occurs. Water always has to go somewhere. If the project changes its location, someone will review the impact.

    Why These Approvals Are Non-Negotiable

    Fire and environmental reviews in Idaho are strict because the consequences are serious. If fire access fails, people may not get out, and responders may not get in. If septic fails, wastewater can contaminate groundwater. If drainage is mishandled, neighboring properties and waterways can be damaged. If wildfire risk is ignored, one structure can become part of a larger community emergency.

    That is why these approvals do not bend easily around convenience.

    A project can be perfectly zoned, legally platted, carefully designed, and well engineered, yet still face a hard stop at this stage. The reviewer’s job is to enforce safety, health, and environmental standards before the project becomes a bigger problem.

    Common Reasons Projects Fail at This Stage

    The most common failures usually come from early assumptions. Buyers assume the road is good enough because they can drive it. They assume the well or nearby hydrant solves fire protection. They assume a large lot can handle septic. They assume floodplain or WUI rules will be minor.

    They assume environmental review is only a formality.

    Problems often include inadequate fire apparatus access, insufficient fire flow, missing turnaround space, road or bridge limitations, septic soils that do not pass review, missing reserve drainfield area, underestimated WUI construction requirements, floodplain restrictions, unmanaged stormwater, or sensitive site conditions that were not evaluated early enough.

    The painful part is timing. Those issues often surface after money has already been spent on surveys, design work, engineering, or purchase negotiations.

    The Key Takeaway for Idaho Buyers and Landowners

    The point of fire and environmental reviews in Idaho is to answer the question that matters when something goes wrong: will people survive, and can the damage be contained?

    These reviews are not minor paperwork steps. They are the safeguards that sit between a prospective project and a project that creates unnecessary risk.

    Before you buy land, design a custom home, or assume a parcel is ready to build, ask early questions about fire access, water supply, WUI exposure, septic feasibility, floodplain limits, stormwater, and environmental history. The sooner those answers are confirmed, the easier it is to decide whether the property supports your plans.

    Thinking About Buying or Building on Land in Idaho?

    Sunrise Realty Group helps buyers look beyond the listing details to understand the questions that matter before they commit to land, design, or construction plans.

    If you are evaluating a property in Boise, the Treasure Valley, or elsewhere in Idaho, Contact Sunrise Realty Group before you assume the approval path is simple. A beautiful parcel is only a smart purchase if it can support the life you want to build there.

    In the following part of this series, we’ll move into the final technical layer: building department review, inspections, and the Certificate of Occupancy, the step that determines whether a structure can legally be used.

    Learn how fire and environmental reviews in Idaho affect building approvals, fire access, WUI rules, septic approval, drainage, land value.
  • Engineering and Utility Review in Idaho: Why Building Projects Stall

    Part 4 of the Series “How the Building Approval Process Actually Works in Idaho”

    By this point in the building approval process, many buyers and landowners feel like the hard part is behind them.

    Let’s say the zoning works, the parcel is legal, and the building idea seems reasonable. The property may even appear promising on a map, with road frontage, nearby homes, and visible utility poles.

    Next, the engineering and utility review begins.

    Here’s the thing: engineering and utility review in Idaho is when responsibility shifts from planning departments to engineering staff and utility providers. Local engineering reviewers assess if the site can support the structure. All while utility companies determine system connections for daily use.

    A property can pass zoning review yet face problems with driveway access, stormwater drainage, sewer capacity, septic suitability, water pressure, fire flow, road improvements, or utility extensions.

    For buyers, builders, and landowners in Idaho, this step matters because infrastructure is not automatic. Approval from one department does not force another department or utility provider to say yes.

    What Engineering and Utility Review in Idaho Actually Decides

    Engineering review focuses on the systems around the building, not the interior layout of the building itself.

    Planning and zoning decide if a use is allowed. Building review looks at construction plans. Engineering, public works, transportation, drainage, and utilities all assess how the project functions on the ground.

    They want to know whether the project can be built without creating safety problems, damaging neighboring properties, overloading public infrastructure, or creating long-term maintenance issues.

    Depending on the location, a project may be reviewed by city or county engineering departments for site infrastructure, public works for public improvements, highway districts for road compliance, stormwater reviewers for drainage needs, water providers and sewer districts for connections, electrical or natural gas utilities for service feasibility, fire officials for emergency access, or local health districts for septic evaluation.

    Each entity has the authority to add conditions that must be resolved prior to construction, inspection, or occupancy.

    Access and Road Standards Can Stop a Project Early

    Access is one of the first infrastructure questions buyers should take seriously.

    A parcel may touch a road and still have access problems. Engineering staff may review driveway location, width, slope, visibility, road classification, emergency vehicle access, and turnaround requirements. If the access point is unsafe or does not meet local standards, the project could be delayed until a better solution is designed.

    For the most part, this really matters most on rural parcels, hillside lots, flag lots, private roads, and properties near curves, intersections, canals, irrigation ditches, or steep grades.

    Buyers often look at a road and assume, “Ok, there’s the entrance!” But reviewers assess whether that entrance can safely accommodate vehicles, fire apparatus, drainage, snow, maintenance, and long-term use.

    Access approval may require road widening, a new driveway approach, an engineered turnaround, a shared access agreement, or proof that an easement is legally sufficient. These issues are much easier to evaluate before closing than after design work has already been spent.

    Stormwater and Drainage Are Bigger Than Most Buyers Expect

    Stormwater review is one of the most common reasons projects slow down.

    A flat infill lot, a sloped foothills property, a rural acreage parcel, and a commercial site may all trigger different questions. Engineering reviewers want to understand where runoff goes, whether the project changes drainage patterns, and whether neighboring properties could be affected.

    Stormwater review itself may involve on-site retention and detention, swales, drywells, erosion control, culverts, grading plans, and other engineered solutions. Reviewers may also care about erosion and sediment control during construction, especially if the site has slopes, disturbed soil, nearby waterways, or drainage channels.

    This is where that whole “the lot looks buildable” thing can fall apart. A house pad may fit on paper, but if the grading plan directs runoff toward a neighbor, a public road, a canal, or an unstable slope, engineering staff will want that problem solved before the project moves forward.

    Grading, Slopes, and Right-of-Way Issues

    Land does not have to be extreme to create engineering concerns.

    Grading review may include cut-and-fill, slope stability, retaining walls, drainage paths, floodway interaction, and impacts on adjacent properties. Steep or irregular lots often require engineered solutions, but even moderate slopes can trigger additional review if the project changes water flow, requires retaining walls, or affects public right-of-way.

    Right-of-way can add another layer. Public right-of-way is the area reserved for roads, sidewalks, utilities, drainage, and other public improvements. If a project affects that area, engineering or public works staff may require additional permits, design changes, or improvements.

    This does not always mean the project is denied. It may mean approval comes with conditions. A landowner may be required to install a sidewalk, widen a portion of a road, improve drainage, relocate an approach, or complete off-site improvements before final approval or occupancy.

    Conditions of Approval Are Not Suggestions

    One of the most important concepts in engineering review is the condition of approval.

    A condition of approval is a requirement attached to a permit or approval. It may require improvements before construction, inspection, or occupancy.

    These conditions are not optional. Ignoring them can stall a project even after construction has started. In some cases, the building may be mostly complete, but occupancy cannot be granted until the condition is satisfied.

    That is why buyers and builders should read approval letters carefully. The headline may say approved. The conditions may say, “Here is everything you still have to do.”

    Utilities Have Their Own Approval Power

    Utility service is another area where buyers make risky assumptions.

    A nearby utility line or neighboring home with service does not guarantee service to a new structure. Utility providers review capacity, location, easements, connection standards, meter placement, system pressure, load demand, and requirements.

    Water service may be provided by a municipal water department, a private water company, or a private well. Sewer service may involve a municipal sewer department, a sewer district, or septic approval through the appropriate health district.

    Septic review can involve soil suitability, setbacks, reserve areas, system type, and whether the property has enough usable area for a compliant system. Electrical utilities may review load demand, transformer availability, easement needs, trenching, service location, and required upgrades.

    None of this should be treated as a box to check later. Utility feasibility can affect where a home sits, how much it costs to improve the site, and whether the project is financially realistic.

    Why Projects Stall at This Stage

    Projects usually stall during engineering and utility review because something was assumed too early.

    Buyers often assume driveway approval, builders presume nearby utilities suffice, and owners think. Typical stalling factors include underestimated infrastructure costs, limited utilities, additional access requirements, missing easements, and off-site upgrade requirements.s: underestimated infrastructure costs, limited utilities, extra access needs, missing easements, and off-site upgrade requirements.

    By the time these issues surface, buyers may have already paid for surveys, drawings, engineering work, lender fees, or earnest money. That is why this stage deserves attention before a purchase becomes emotionally or financially locked in.

    The Key Takeaway for Idaho Buyers and Landowners

    Engineering and utility review in Idaho confirms whether a site can safely support the project as planned—not whether the concept sounds appealing.

    Can people reach it safely? Can emergency vehicles access it? Can stormwater be managed responsibly? Can the road system handle the impact? Can the property receive water, sewer, septic, power, or gas service in a practical way? Can the required improvements be completed within the buyer’s budget?

    Zoning and plat approval are important, but they do not resolve every infrastructure hurdle. Engineering and utility review can still uncover deal-breakers.

    At this stage, due diligence means verifying access, drainage, utility capacity, right-of-way needs, and agency conditions—before assuming a property is build-ready.

    In the next part of the series, we’ll examine fire, environmental, and life-safety reviews—further steps with their own challenges and requirements.

    Thinking About Buying or Building on Land in Idaho?

    Before you assume a property is ready to build, make sure the access, utilities, drainage, and approval requirements actually support your plans.

    Sunrise Realty Group helps buyers look beyond the listing details so they can ask better questions, avoid expensive surprises, and move forward with more confidence.

    Ready to talk through a property before you commit?

    Contact Sunrise Realty Group for local guidance on buying land, building, and navigating real estate decisions across Boise and the Treasure Valley.

    Learn why engineering and utility review in Idaho can delay building projects, from access/drainage to water, septic, and utility service.

  • Is It Really a Buildable Lot in Idaho? Platting, Access, and Legal Buildability

    Part 3 of the Series: How the Building Approval Process Actually Works in Idaho

    If you are trying to figure out whether you have a buildable lot in Idaho, zoning is only one part of the answer. A property can look legitimate in every casual sense. It may have a tax parcel number, appear on county maps, and even be bought and sold without much question. None of that automatically means the lot is legally buildable.

    That gap catches buyers off guard all the time. They assume the hard part is over because the zoning seems right and the land appears to exist as its own parcel. Then, somewhere between due diligence and permit review, they learn that the lot was never properly created, lacks legal access, or has easements and configuration problems that make development difficult or impossible. By then, the surprise is no longer theoretical. It is expensive.

    This part of the approval process matters because it answers a different question than zoning does. Zoning helps determine what may be allowed on a property. Platting, subdivision history, access, and legal configuration help determine whether the property can support building at all.

    Before someone invests in plans, engineering, or a purchase that assumes a straightforward project, they need to know whether the lot qualifies as a legal building site in the eyes of the local jurisdiction.

    A Parcel Can Exist Without Being Legally Buildable

    One of the biggest misunderstandings in land buying is the assumption that a parcel and a buildable lot are the same thing. They are not.

    A parcel number exists mainly for tax and ownership purposes. It tells the county that a piece of land is being tracked, assessed, and transferred. A buildable lot is something different. It is a lot that local government recognizes as having been lawfully created and configured in a way that can support development under current rules.

    That distinction matters more than many buyers realize. Land can be deeded, taxed, inherited, listed for sale, and shown on GIS maps, even if it falls short of legal buildability standards. A parcel may be real enough to own but still not qualify for a building permit without additional approvals, corrections, or legal cleanup.

    That is why buyers who stop their research at zoning often get into trouble. The zoning may look fine, but zoning alone does not confirm that the lot itself is valid for development.

    Who Reviews Lot Legality and Buildability?

    Before any property is treated like a true building lot, someone has to verify that it was created in a way the local jurisdiction still recognizes.

    That review usually starts with the planning department, but it can also involve engineering, public works, survey staff, and, in some cases, a hearing body or elected officials if a correction or approval is needed.

    What they are really looking at is whether the lot holds up as a legal building site today, not just whether it has been sitting on the books for years. That can mean digging into old plats, deeds, lot line adjustments, exemptions, access records, easements, and the current dimensional rules that apply to the property.

    This is where some buyers get surprised. A parcel can seem established because it has existed for a long time, shows up on maps, and has changed hands before. Still, none of that actually guarantees the lot will pass buildability review without issues.

    In fact, older rural parcels are often where the harder questions start.

    Why Platting Matters More Than Buyers Expect

    A lot’s subdivision history often determines whether it can move forward cleanly or become a slow, frustrating project.

    When a city or county looks at platting, it is trying to confirm that the lot came into existence through an approved process. That could mean a recorded subdivision plat, a short plat, a lawful lot line adjustment, or another recognized exemption.

    If the land was divided informally decades ago without completing the required process, the parcel may still exist for tax purposes while remaining legally questionable for development.

    That is more common than people think, especially in rural areas where land may have changed hands several times over the years. A buyer sees a separate tax parcel and assumes that means the lot has already cleared the legal hurdles. Sometimes it has. Sometimes it has not. And when it has not, the fix can take time, money, and patience.

    Platting review also confirms whether the lot meets basic physical standards. A parcel that is too narrow, oddly shaped, or undersized for the zoning district may not be an automatic dead end.

    Still, it may require a re-plat, a variance, or another formal process before construction can move ahead. That is the kind of issue that is easy to miss early and hard to ignore later.

    Access Problems Can Stop a Project Cold

    Access is one of the clearest examples of why a buildable lot in Idaho is about more than what you can see on the ground.

    A property may have a driveway. It may be reachable by dirt road. It may even have been used that way for years. None of that automatically proves legal access. Local jurisdictions usually want to see frontage on a public road or a properly recorded access easement that gives the lot recognized legal entry.

    That difference between physical access and legal access is where many buyers get burned. A person may be able to drive to the property without issue, yet still discover that the recorded access is missing, defective, or insufficient to support development. A lender, title company, or permit reviewer may see that problem very differently from a seller who simply says, “You can get there.”

    Landlocked or access-challenged parcels are not rare, especially outside city limits. Older splits, private roads, and long-standing informal arrangements can make a property feel usable until someone asks for documentation. 

    Once that happens, a casual assumption about access becomes a legal problem that has to be solved.

    Easements Can Shrink a Lot Fast

    Another reason buyers misjudge buildability is that they focus on the parcel boundary without paying enough attention to what crosses the site.

    Easements can quietly take a large bite out of a lot’s usable area. Utility easements, drainage easements, access easements, irrigation corridors, and canal-related restrictions may all affect where a structure can go. A lot can look wide open on a map and still have a building envelope that is much smaller than expected once the easements are understood.

    This is especially important on smaller or unusually shaped parcels, where the practical building area is already limited. A lot may still technically exist, but if say, the buildable area is pinched by drainage, setbacks, or access corridors, the project can become much more difficult than the buyer expected.

    In some cases, the lot remains legal but functionally awkward. In others, the constraints are serious enough that reconfiguration or additional approvals are required before the property can work.

    Why So Many Buyers Miss This Step

    Most buyers do not miss this step because the property appears to check all the boxes that usually make people feel safe. The listing looks legitimate. The parcel shows up on the map. There is a tax ID number. The zoning seems workable. On the surface, that feels like enough.

    One problem is that those signs can create a false sense of certainty. When land appears normal in public records, people tend to assume the deeper legal questions have already been settled. They assume someone else must have actually confirmed the lot was properly created, that access really is legally secure, and that the parcel can support development without a single issue.

    That is where expensive mistakes begin. A seller may assume a parcel is grandfathered because it has existed for years, or buyer may give a title report more weight than it deserves. A visible road can be mistaken for legal access. A separate parcel number can be mistaken for proof that the lot was lawfully created.

    By the time a planner, surveyor, or permit reviewer raises a problem, money has often already been spent and expectations are already in motion.

    Signs a Lot Deserves a Closer Look

    Some properties deserve extra caution from the start.

    Older parcels created before modern subdivision rules are often in need of closer review. Rural land outside city limits can raise more questions about legal creation and access. Private road access can be fine, but only if the documents behind it are solid. Missing plats, overlapping deeds, or easements cutting through the apparent building area are all signs that a buyer should slow down and look deeper.

    None of those conditions automatically make a property bad. They simply mean the lot should not be treated as routine. When the goal is to confirm a buildable lot in Idaho, unusual history and unusual site conditions deserve more attention, not less.

    What Happens When the Lot Falls Short

    If the jurisdiction finds that the lot is legally deficient, the next step depends on the nature of the problem.

    In some cases, the solution may be a lot line adjustment. In others, it could mean a new plat, a re-plat, creation of a formal access easement, relocation of an easement, or infrastructure work tied to development standards.

    What catches buyers off guard is how long these fixes can take. A problem that sounds minor in conversation may involve survey work, engineering review, public notice, agency coordination, or hearings. Even when a solution exists, it is rarely instant. Timelines stretch and costs begin to grow. Design options can even become narrow.

    That does not always mean the deal is dead. It means the property should be evaluated honestly before anyone treats it as a clean, ready-to-build site.

    The Bottom Line on Legal Buildability

    A parcel can look completely legitimate in all the ways that matter to a casual buyer and still fail the test of legal buildability.

    That is why this stage of the process matters so much. Zoning tells you part of the story, but it does not tell you whether the lot was lawfully created, whether it meets current standards, whether access is legally secure, or whether easements leave enough room to build.

    For buyers, builders, and landowners, that is the real takeaway. Before assuming a property is ready for the next step, make sure the actual lot itself holds up under review.

    If you are evaluating a buildable lot in Idaho, the safer move is to confirm legality, access, and configuration early, before the project reaches the point where bad assumptions become expensive ones.

    In the next part of the series, the focus moves to engineering, infrastructure, and utilities, where many projects run into the next round of problems even after zoning and lot legality appear to be resolved.

    Buildable lot Idaho: learn how platting, legal access, easements, and lot history affect whether land can actually be built on.

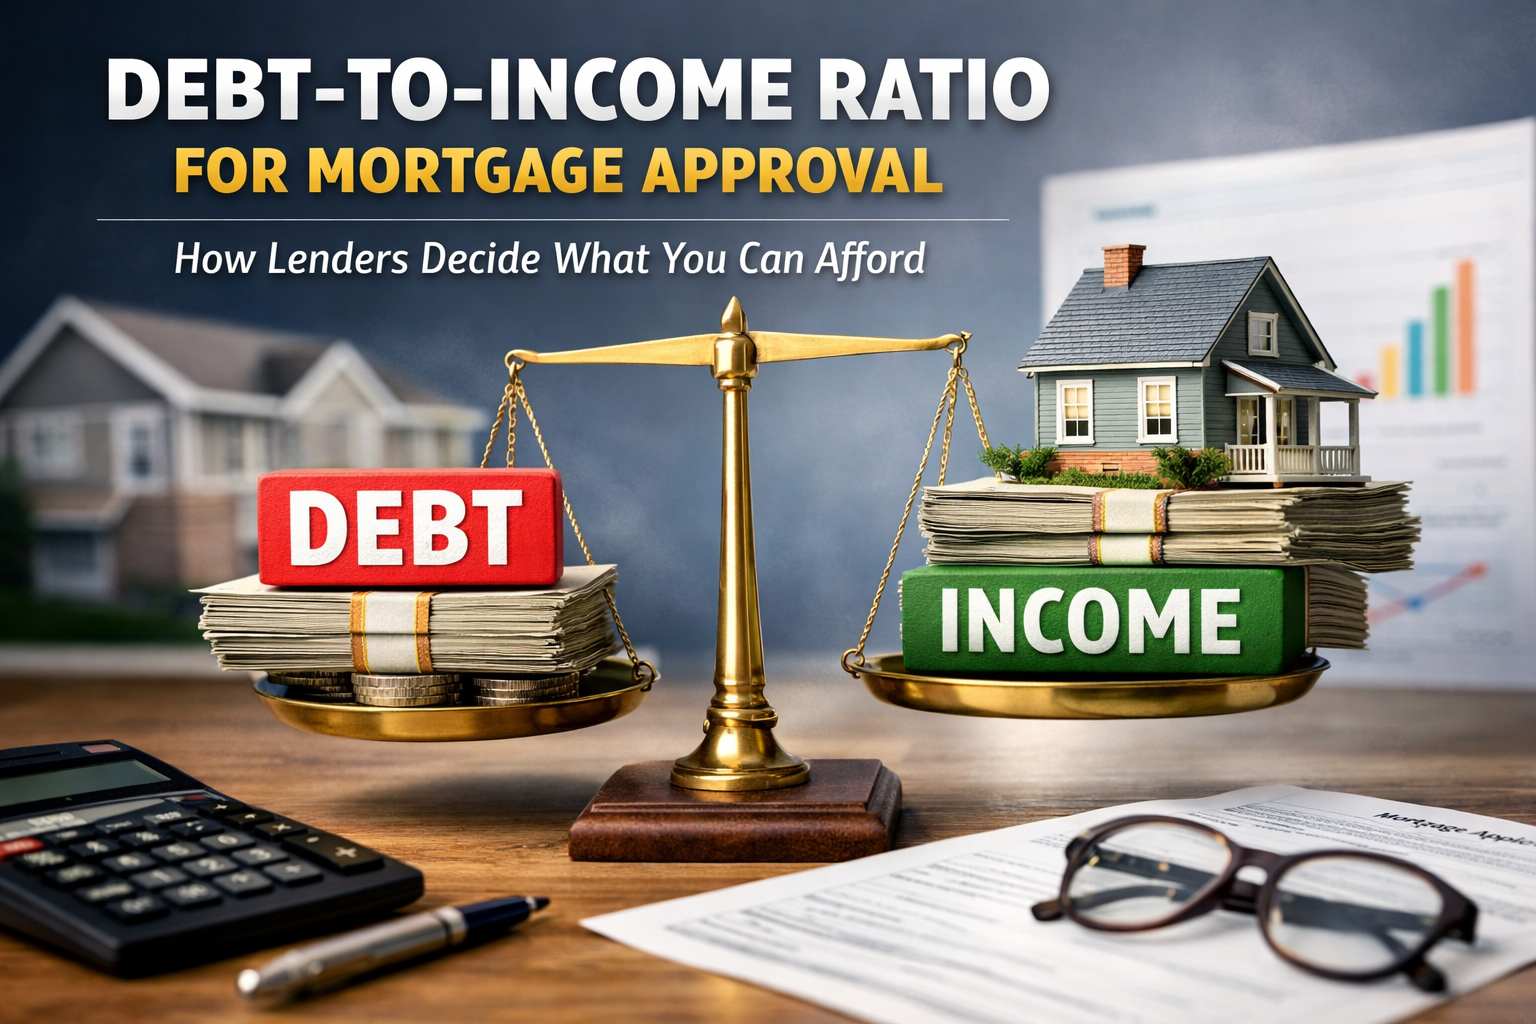
  • Debt-to-Income Ratio for Mortgage Approval: How Lenders Decide What You Can Afford

    Debt-to-Income Ratio for Mortgage Approval: How Lenders Decide What You Can Afford

    When you apply for a home loan, lenders do not just look at your credit score or how much cash you have saved. One of the most important numbers in the mortgage approval process is your debt-to-income ratio, often shortened to DTI.

    DTI is one of the main tools that lenders use to decide whether a mortgage payment looks realistic for your budget; not just now, but over time.

    Understanding how DTI works can help you set better expectations, avoid surprises during underwriting, and make smarter financial decisions before you ever submit an offer on a home.

    Your debt-to-income ratio matters because many buyers start with the monthly payment they hope they can afford, then assume the lender will see things the same way. That is not always how it works.

    A payment may look manageable on paper to a borrower, but the lender is looking at the full picture – including recurring obligations and long-term risk. That is where DTI becomes so important.

    This article breaks down DTI in plain language, explains how lenders calculate it, and shows why it matters so much in real-world loan approvals.

    What is the Debt-to-Income Ratio for a Mortgage?

    ‘Debt-to-income ratio’ ,or DTI, measures how much of your gross monthly income is already actively committed to debt payments.

    Lenders use DTI to answer a simple question: after adding this mortgage, can the borrower reasonably handle their total monthly obligations without taking on too much financial risk?

    DTI is expressed as a percentage, not a dollar amount. A higher DTI means more of your income is already committed to other debts. A lower DTI usually suggests more financial flexibility.

    That does not mean a lower DTI automatically guarantees approval, nor does it mean a higher DTI always leads to denial. It really just gives the lender a quick way to measure how stretched your monthly finances may be once a mortgage payment is added to the mix.

    For buyers, understanding that early can be useful. It helps take some of the mystery out of the lending process and gives you a better sense of how lenders are thinking before you are deep into a transaction.

    The Basic DTI Formula

    The math behind DTI is straightforward:

    DTI = Total Monthly Debt Payments ÷ Gross Monthly Income

    A few important clarifications help here.

    Gross monthly income is the total income you earn in a month before deductions.

    Total monthly debt payments are the fixed, recurring obligations that show up on your credit report or are otherwise legally required.

    That is why DTI is not really about your day-to-day spending habits. It is about what the lender sees as ongoing monthly debt.

    This is also where some buyers get tripped up. They may think, “I do not spend that much every month,” and that may be true. However DTI is not measuring whether you cook at home, skip subscriptions or keep a tight grocery budget. It measures the obligations that are expected to keep showing up every month, whether you like it or not.

    What Counts as Debt and What Does Not

    One of the easiest ways buyers get caught off guard is by assuming lenders count every bill the same way.

    Debts that ARE typically included in a DTI ratio:

    • Proposed housing payment
    • Current rent
    • Principal
    • Interest
    • Property taxes
    • Homeowner’s insurance
    • HOA dues
    • Auto loans
    • Student loans
    • Credit card minimum payments
    • Personal loans
    • Child support or alimony
    • Installment debts

    Now to be clear, not all of these are always going to be applicable. Just keep in mind if a payment is contractual and recurring, the lender will likely count it.

    Expenses that are typically NOT included in a DTI ratio:

    • Utilities
    • Groceries
    • Gas
    • Cell phone and internet
    • Insurance unrelated to the mortgage
    • Subscriptions or entertainment
    • General lifestyle spending

    Lenders are focused on legal monthly obligations, not discretionary spending.

    That difference is worth paying attention to because it can change how buyers prepare. Someone may spend very little in everyday life and still have a DTI problem because of car loans, student loans or revolving debt.

    Front-End vs. Back-End DTI

    There are two DTI ratios you may hear about during the loan process, but the back-end ratio is usually the one that matters most in underwriting.

    Front-End DTI

    Front-end DTI looks only at your housing payment.

    Monthly Housing Payment ÷ Gross Monthly Income

    Example:

    $2,000 housing payment ÷ $6,000 gross monthly income = 33%

    Lenders use the acronym PITI (Principle, Interest, Taxes and Insurance) They will typically include the HOA dues as well. Some loan programs still reference this number, but it is not usually the main deciding factor on its own.

    Back-End DTI

    Back-end DTI looks at your full monthly debt picture.

    Monthly Housing Payment + All Other Monthly Debts ÷ Gross Monthly Income

    This is the ratio lenders usually focus on most because it reflects your total monthly financial burden.

    That is the number that tells them whether the new mortgage fits into the rest of your financial life or starts pushing things too far. In other words, back-end DTI is where the pressure really shows up.

    Savvy home buyers typically do their due diligence before they ever get involved in the home buying process. It is hard when you spend so much time searching for the perfect home just to find out you cannot afford it.

    A Real-World DTI Example

    Here is what that can look like in practice.

    Monthly gross income: $7,000

    Monthly debts:

    • Proposed mortgage: $2,100
    • Car loan: $450
    • Student loan: $350
    • Credit card minimums: $100

    Total monthly debt: $3,000

    DTI = $3,000 ÷ $7,000 = 42.8%

    That number gives the lender a quick snapshot of how much of your monthly income is already tied up before new financial surprises ever enter the picture.

    It also helps explain why two homes with similar prices may not feel the same during preapproval. Taxes, insurance, HOA dues, and even the loan structure can affect the proposed housing payment, which, in turn, affects DTI. Buyers sometimes focus only on the listing price, but lenders are looking at the full monthly obligation.

    Why DTI Matters So Much

    Your debt-to-income ratio for mortgage approval can affect far more than whether you get a yes or no.

    DTI can influence:

    • Loan approval or denial
    • Maximum purchase price
    • Loan program eligibility
    • Interest rate and pricing
    • Underwriting conditions

    It is also important to remember that DTI is not reviewed the same from on lender to another.

    Two different borrowers can have the same DTI and still get very different outcomes depending on their willingness to be flexible.

    A borrower with stronger credit, more cash reserves and a more stable financial profile may have more flexibility than someone with the same DTI but weaker compensating factors. That is why DTI matters, but it is not the only important number.

    Buyers should always remember not to treat online calculators as the final word. They can be helpful starting points, but they usually do not account for the full nuance of underwriting. Real loan approval depends on more than a rough estimate.

    Compensating Factors That Can Offset a Higher DTI

    Sometimes lenders will allow a higher DTI when the borrower looks especially strong in other parts of the application.

    Typical compensating factors may include:

    • High credit scores
    • Significant cash reserves
    • A minimal payment increase from the current housing
    • Long and stable employment history
    • Strong residual income
    • A larger down payment

    These strengths can reduce the lender’s overall risk perception, even when DTI is on the higher end.

    That does not mean compensating factors erase the issue. It means they can give the lender more confidence that the borrower is still likely to manage the payment responsibly.

    Remember that DTI exists so lenders can limit their own risk. They want to be reassured if they lend you money you will pay back your debt obligation each month.

    Common DTI Mistakes Borrowers Make

    Many buyers run into trouble simply because they misunderstand how DTI works.

    Some of the most common mistakes include:

    • Forgetting to account for HOA dues
    • Misunderstanding how student loans are calculated
    • Assuming net income matters more than gross income in DTI math
    • Opening a new credit before closing
    • Paying off the wrong debt and expecting a major DTI improvement

    That last point matters more than many borrowers realize. Not every payoff changes your DTI in a meaningful way, so understanding what is considered relevant debt matters.

    A buyer may think paying off a smaller debt is the obvious move, when in reality, a different obligation has more impact on the monthly ratio.

    An important point to note is purchases made on credit cards during the financing approval process is highly discouraged and will likely result in your financial profile adjusting with lenders. This creates DTI issues and it is typically advised you don’t buy ANYTHING on credit cards 2 months prior to purchasing a home to avoid this concern.

    If you’re trying to understand what comes after financing prep, explore The 3-One Method to see how Sunrise Realty helps guide buyers from planning to home.

    The Big Takeaway

    Debt-to-income ratio for mortgage approval is really about what the lender believes you can safely manage over time.

    Understanding DTI early can help you:

    • Set more realistic home-buying expectations
    • Choose the right loan program
    • Increase approval odds before applying
    • Avoid last-minute underwriting surprises

    If you want to apply this to your own situation, the next steps usually look like this:

    • Run a personalized DTI scenario
    • Work on lowering DTI before applying
    • Compare DTI rules across different loan programs
    • Figure out a realistic maximum purchase price

    Those steps can make the difference between a stressful vs. smooth approval process.

    Most buyers do not need to memorize every underwriting formula. They need to understand that the debt-to-income ratio is one of the main ways lenders decide what feels affordable on paper. 

    The sooner you understand that, the easier it is to plan realistically and move forward with fewer surprises.


    When you are buying a home, clarity matters and your DTI ratio is one of the numbers that helps create it. If you’re thinking about buying and want help understanding what’s realistic for your budget, contact Sunrise Realty Group today.

    Learn how debt-to-income ratio affects mortgage approval, what lenders count, and how DTI shapes what home price you can realistically afford.

  • Introducing the Builder Plan Licensing Program by The Sunrise Realty Group

    Introducing the Builder Plan Licensing Program by The Sunrise Realty Group

    A New Approach to Residential Plan Access for Builders

    At The Sunrise Realty Group, we are always looking for ways to better support builders, developers, and real estate professionals throughout the Treasure Valley.

    Recently, MC Design House joined The Sunrise Realty Group, allowing our companies to work together more closely and provide a broader range of services for the residential construction industry. By bringing residential design and real estate services together under one umbrella, we are able to offer builders a more streamlined experience when planning and developing new homes.

    Today we are excited to introduce a new program designed specifically for builders who regularly construct repeatable homes.

    The Builder Plan Licensing Program

    The Builder Plan Licensing Program is a new approach to how builders access residential construction plans.

    For more than 30 years, MC Design House has been designing homes throughout the Treasure Valley. During that time we have worked with a wide range of builders and have gained valuable insight into how plans are actually used in the construction process.

    What we have learned is that many builders often rely on a set of proven home designs that can be built repeatedly with little or no modification. However, the traditional process requires purchasing a new plan each time a project begins.

    The Builder Plan Licensing Program changes that.

    Instead of purchasing plans individually for every project, builders enrolled in the program gain access to a curated selection of residential designs that can be deployed across multiple projects through a simple licensing structure.

    Our goal is to make the process faster, more predictable, and more cost-effective for builders who construct multiple homes each year.


    How the Program Works

    Beginning May 1st, builders who enroll in the Builder Plan Licensing Program will gain access to a curated selection of residential home plans.

    Builders can deploy these plans across their projects during the term of the program using plan licenses.

    Each builder will be able to deploy up to 12 plan licenses during the six-month program term.

    Each license allows the builder to construct one home using a plan from the Builder Plan Library.

    Builders have flexibility in how those licenses are used. Licenses can be used for upcoming projects as needed, deployed multiple times in a single month or spread out across the full six-month term

    At the end of the six-month period, builders may renew their participation in the program for another term.

    This structure allows builders to maintain flexibility while keeping design costs predictable.


    Program Tiers

    The Builder Plan Licensing Program is offered in four tiers, based on the size of the homes being constructed.

    Each tier provides access to plans within a specific square-footage range.


    Tier 1

    Plans up to 2,000 square feet

    $3,000 per month
    6-month term

    Total available licenses: 12 homes


    Tier 2

    Plans up to 3,000 square feet

    $4,500 per month
    6-month term

    Total available licenses: 12 homes


    Tier 3

    Plans up to 4,000 square feet

    $6,000 per month
    6-month term

    Total available licenses: 12 homes


    Tier 4

    Plans larger than 4,000 square feet

    Pricing for Tier 4 plans will be determined based on the specific needs of the builder and the types of homes being constructed.


    Additional Licensing Option

    Builders who anticipate a higher volume of projects can expand their plan usage within the program.

    For an additional $1,000 per month, builders can increase their allowance to 18 total plan licenses during the six-month term.

    This option allows builders who are producing a higher number of homes to maintain the same streamlined licensing structure while increasing their deployment capacity.


    Program Launch

    Enrollment for the Builder Plan Licensing Program begins May 1st.

    Builders interested in participating in the program are encouraged to reach out to learn more about how the program works and determine which tier best fits their construction needs.

    We are always looking for ways to provide additional value to our builder partners, and we believe this program offers a unique opportunity to streamline the plan process while reducing overall design costs.

    If you would like to learn more or reserve a spot in the program, please feel free to contact us.

    We look forward to continuing to support the builders who are shaping the future of housing in the Treasure Valley.

  • What the FEMA Flood Map Really Means — and How It Affects Your Property, Loan, and Insurance

    What the FEMA Flood Map Really Means — and How It Affects Your Property, Loan, and Insurance

    If you’ve ever heard a lender, insurance agent, or real estate professional say “according to the FEMA flood map,” you might assume it’s simply a reference to general flood risk.

    In reality, the FEMA flood map is the official flood hazard map used across the United States to determine flood risk, flood insurance requirements, construction standards, and lending decisions. For property owners, misunderstanding what the FEMA flood map shows can affect insurance costs, financing approval, and even the feasibility of new construction.

    For buyers, builders, and landowners, a property’s position on the FEMA flood map can influence everything from required flood insurance policies to foundation design and base flood elevations.

    Let’s break down what the FEMA flood map actually is, who regulates it, how it affects loans and insurance, and what property owners can do if the map does not accurately reflect their property’s flood risk.

    What the FEMA Flood Map Is (Flood Insurance Rate Map – FIRM)

    When professionals refer to the FEMA flood map, they are almost always referring to the Flood Insurance Rate Map (FIRM).

    The FIRM is what’s known as the official flood map of a community used by the Federal Emergency Management Agency (FEMA) to identify flood hazards and determine flood insurance requirements under the National Flood Insurance Program (NFIP).

    These flood hazard maps are the authoritative source used by lenders, insurance providers, builders, and local governments.

    A FEMA flood map (FIRM) is used to:

    • Identify Special Flood Hazard Areas (SFHAs)
    • Assign flood zones (A, AE, AO, VE, X, etc.)
    • Establish Base Flood Elevations (BFEs)
    • Define specific areas with the highest risk of flooding
    • Support risk assessments and flood insurance pricing
    • Guide current development standards for new construction

    The effective flood maps for each community are publicly available through the FEMA Flood Map Service Center, where property owners can search by street address and review their community’s flood risk.

    GIS overlays and local flood hazard layers may be useful planning tools. Still, the effective FEMA flood map remains the official map of a community with legal authority for lending and insurance decisions.

    How the FEMA Flood Map Is Created and Regulated

    The Federal Emergency Management Agency manages flood mapping nationwide as part of the National Flood Insurance Program.

    Federal law requires FEMA to conduct flood insurance studies, analyze water flow, and publish flood hazard maps that reflect a community’s flood risk.

    Flood mapping involves extensive technical work, including:

    • Hydraulic analyses of rivers and drainage areas
    • Detailed analyses of flood patterns and flood waters
    • Measurement of average flood depths
    • Identification of base floodplain elevations
    • Modeling of storm surge and flooding in coastal areas

    This information forms the basis for digital flood insurance rate maps (DFIRMs) and the National Flood Hazard Layer, which integrates flood hazard data across the United States.

    FEMA frequently updates these maps through programs such as Risk MAP, working with local governments, community officials, and Cooperating Technical Partner programs to incorporate improved data and flood hazard information.

    In many communities, updated flood studies include:

    • Sea level rise modeling
    • Changes in drainage areas
    • New rainfall patterns and heavy rains
    • Urban development impacts
    • Revised average depths and water flow calculations

    Because flood conditions evolve, communities periodically receive preliminary flood hazard data or preliminary FIRMs before new maps become effective.

    How the FEMA Flood Map Defines Flood Risk

    The FEMA flood map is designed to identify areas with a measurable probability of flooding.

    The most widely recognized floodplain classification is the 100-year flood, which refers to a 1% (percent) annual chance of actual flooding in any given year.

    Areas inside this boundary are classified as Special Flood Hazard Areas (SFHAs) and represent high-risk flood zones.

    Common SFHA zones on the FEMA flood map include:

    • Zone A
    • Zone AE
    • Zone AO
    • Zone AH
    • Zone VE (coastal high-risk flood zone)

    These zones represent actual locations where flood waters are most likely to reach structures, often requiring more stricter building standards and of course, mandatory flood insurance.

    Zones labeled X represent moderate risk or minimal flood risk areas. While insurance may still be recommended, these areas generally do not trigger mandatory insurance for federally backed loans.

    Flood risk categories are actually based on several key factors, including:

    • Base flood elevations
    • Average flood depths
    • Water velocity
    • Storm surge exposure in coastal communities
    • Flash floods in smaller drainage basins

    Even outside high-risk areas, flood damage remains one of the most common natural disasters in the United States, which is why FEMA encourages property owners to understand their community’s flood risk even when insurance is not required.

    Why the FEMA Flood Map Triggers Mandatory Flood Insurance

    The FEMA flood map is directly tied to federal lending rules.

    When a structure is located in a Special Flood Hazard Area, and the mortgage is federally backed — such as FHA, VA, or many conventional loans — lenders must enforce mandatory flood insurance purchase requirements.

    This requirement exists to protect both homeowners and the federal mortgage system from catastrophic flood losses.

    Flood insurance policies may be issued through:

    National Flood Insurance Program (NFIP)

    FEMA handles the National Flood Insurance Program. For many it still remains the most widely accepted coverage option.

    NFIP policies:

    • Are backed by the federal government
    • Are sold by private insurance companies under FEMA rules
    • Are accepted by all lenders nationwide

    Standard coverage limits include:

    • $250,000 for residential structures
    • $100,000 for contents

    NFIP policies follow consistent underwriting rules tied directly to FEMA flood maps, base flood elevations, and flood insurance rates established through flood insurance studies.

    Private Flood Insurance

    Private flood insurance carriers increasingly offer alternatives to NFIP coverage.

    Private policies may provide:

    • Higher coverage limits
    • Coverage for additional living expenses
    • Expanded protection for basements or detached structures

    However, lenders must confirm that private policies meet federal compliance requirements, which is why NFIP coverage remains the default option for many mortgage lenders.

    How the FEMA Flood Map Affects Property Owners and New Construction

    For property owners and builders, the FEMA flood map influences much more than insurance, especially when planning new construction.

    FEMA flood maps can also help determine:

    • Minimum finished floor elevations
    • Foundation design requirements
    • Use of necessary flood vents
    • Placement of fill material
    • Permitting timelines
    • Appraisal conditions
    • Overall development feasibility

    Construction projects located within high-risk flood zones often require additional engineering review, elevation certificates, and compliance with local floodplain regulations enforced by a local floodplain administrator.

    In many cases, two properties located only a short distance apart may face dramatically different construction costs if one lies inside a base floodplain. At the same time, the other falls outside the official flood map boundary.

    Understanding a property’s flood zone early in the buying process can prevent costly surprises during permitting or loan underwriting.

    How to Use the FEMA Flood Map Service Center to Check Your Property

    Property owners and buyers can review their property’s flood hazard information through the FEMA Flood Map Service Center.

    This database provides:

    • The official flood map for each community
    • Access to digital flood insurance rate maps
    • Historical flood hazard maps and flood hazard boundary maps
    • Flood insurance studies and technical reports
    • Information about the effective date of each map panel

    By entering a street address, users can view the community’s flood map, identify flood zones, and access additional information about floodplain boundaries.

    Can a FEMA Flood Map Be Challenged?

    In some situations, the FEMA flood map may not accurately reflect a property’s elevation or flood risk.

    Property owners may request formal revisions through Letters of Map Change (LOMC).

    Some of the most common processes include:

    • LOMA – Letter of Map Amendment
    • LOMR – Letter of Map Revision
    • CLOMR – Conditional Letter of Map Revision

    These requests most typically require:

    • A certified elevation certificate
    • Engineering analysis
    • Surveyed elevation data
    • FEMA review and approval

    When successful, a letter of map change can remove a property from a higher-risk flood zone, eliminate mandatory insurance requirements, and improve resale value.

    The Bottom Line on the FEMA Flood Map

    The FEMA flood map is the official tool used to identify flood risk across communities in the United States.

    It determines:

    • Which areas are classified as Special Flood Hazard Areas
    • Where mandatory flood insurance applies
    • How properties must be built or elevated
    • How lenders assess flood risk during financing

    For buyers, builders, and property owners, understanding how the FEMA flood map works can prevent delays, unexpected insurance costs, and construction challenges.

    Talk With Sunrise Realty Group About Flood Risk Before You Buy

    Flood zones can affect financing, insurance requirements, and what can realistically be built on a property. Knowing what you’re getting yourself into is a smart move.

    Checking the FEMA flood map early is wise, especially when purchasing land, rural acreage, or property near waterways.

    At Sunrise Realty Group, we help buyers review flood hazard information, understand how it may impact lending and insurance, and look at potential issues before a transaction moves a little too far down the road to turn back.

    If you’re evaluating land or a home purchase and need another set of eyes on the FEMA flood map, reach out to Sunrise Realty Group andwe’ll walk through the details with you.


    Contact Sunrise Realty Group today to discuss your next property purchase with confidence.

    What the FEMA flood map means for property owners. Learn how flood zones affect insurance, loans, construction rules, and more
  • Mortgage vs. Deed of Trust in Idaho

    Mortgage vs. Deed of Trust in Idaho

    Understanding the 40-Acre and 80-Acre Rules That Most Buyers Miss

    Mortgage vs. Deed of Trust is one of the most misunderstood legal distinctions in Idaho real estate, especially for buyers purchasing rural land, acreage, or a new home outside city limits.

    If you’ve ever purchased property in Idaho, you’ve probably heard the terms mortgage and deed of trust used interchangeably. Day-to-day, that’s usually fine—but legally, they are not the same.

    In Idaho, acreage size and land use can directly determine which security instrument is legally allowed for your home loan.

    This distinction becomes critically important for:

    • Rural land purchases
    • Agricultural properties
    • Large acreage parcels
    • Custom home builds outside city limits

    Understanding the differences between a mortgage vs. deed of trust early can save you from a variety of headaches; loan restructuring, frustrating escrow delays, and those last-minute “uh-oh” surprises that impact interest rates, loan terms, and foreclosure rights.

    In this article, we’ll cover the key differences, explain Idaho’s acreage rules, and outline what buyers, builders, and landowners should keep in mind.

    The Core Difference: Mortgage vs. Deed of Trust

    Both instruments are legally binding documents that tie borrowed money to real property as collateral, creating a security interest that protects the mortgage lender (and supports repayment of a mortgage loan or construction loan).

    Mortgages and deeds of trust serve as a security interest for a mortgage lender, ensuring repayment of a mortgage loan or construction loan.

    The main differences come down to:

    • Who holds the property’s legal title as security
    • How foreclosure proceedings work
    • Whether court involvement is required

    At a Glance

    FeatureMortgageDeed of Trust
    Parties involved23
    Security holderLenderNeutral third party
    Foreclosure typeJudicial foreclosure processNon-judicial foreclosure
    Court involvementRequiredNot required
    Speed of foreclosureSlowerFaster
    Common inEastern U.S., District of ColumbiaWestern U.S. (including Idaho)

    What Is a Mortgage?

    Mortgages as we know them are defined as a legal agreement between two parties:

    • Borrower – the person receiving the home loan
    • Mortgage lender – a bank or financial institution

    The borrower of course retains ownership of the property, while the lender holds a legal claim (lien) recorded in public records. The mortgage note and promissory note outline monthly payments, interest rate, and loan terms.

    If the Borrower Defaults

    When borrower defaults occur under a mortgage agreement:

    • The lender must file a lawsuit
    • The foreclosure proceedings move through the court system
    • A judge issues a court order authorizing the sale of the property

    This judicial process offers more borrower protections but significantly increases time, cost, and complexity for lenders.

    What Is a Deed of Trust?

    A deed of trust (sometimes called a trust deed or deed of trust agreement) is a three-party legal instrument:

    • Trustor – the borrower
    • Beneficiary – the lender
    • Trustee – a neutral third party (often a title company, escrow company, or private trust company)

    Under this arrangement, the third-party trustee temporarily holds title to the property on the behalf of the lender as security.

    If the Borrower Defaults

    If borrower defaults occur under a deed of trust:

    • The trustee may act on behalf of the lender
    • Foreclosure can proceed via non-judicial foreclosure
    • The trustee exercises the power of sale
    • The property may be sold at public auction without court proceedings

    This ease of foreclosure is why lenders prefer deeds of trust when state laws allow their use.

    Why Mortgage vs. Deed of Trust Matters in Idaho

    In Idaho, “Mortgage vs. Deed of Trust” is not just a technical distinction — it’s a legal limitation governed by the Idaho Trust Deed Act.

    That’s because once a property exceeds certain acreage thresholds (or is classified as agricultural land), a deed of trust is no longer legally valid, regardless of the lender’s preference. 

    At this point, a mortgage must instead secure the loan.

    This affects:

    • Real estate transactions involving land
    • Construction loans and hard money lender deals
    • Seller financing structures
    • Foreclosure procedures and borrower legal rights

    Idaho’s 40-Acre and 80-Acre Rules Explained (Mortgage vs. Deed of Trust)

    ✅ Property Inside an Incorporated City or Village

    A deed of trust may be used regardless of acreage.

    ✅ Property 40 Acres or Less (Any Use)

    • Agricultural or non-agricultural
    • Rural or urban

    ➡ Deed of trust allowed

    ✅ Non-Agricultural Property Over 40 Acres but Not Exceeding 80 Acres

    • Not principally used for agricultural production

    ➡ Deed of trust allowed

    ❌ When a Deed of Trust Is NOT Allowed

    Agricultural Land Over 40 Acres

    If the piece of property:

    • Exceeds 40 acres and
    • Is primarily agricultural

    ➡ Mortgage required

    Any Property Over 80 Acres

    • Agricultural or non-agricultural

    ➡ Mortgage required

    ➡ Judicial foreclosure required if default occurs

    Common & Practical Examples (Idaho-Specific)

    • 20-acre hobby farm → Deed of trust
    • 60-acre rural homesite (non-ag) → Deed of trust
    • 60-acre working farm → Mortgage
    • 120-acre ranch → Mortgage
    • 10-acre parcel near city limits → Deed of trust

    How This Impacts Buyers, Builders, and New Home Construction

    For buyers building a new home on acreage, the type of security instrument can affect:

    • Loan approval timelines
    • Interest rate and borrower money requirements
    • Availability of construction loans
    • Whether a real estate attorney or a law firm must be involved
    • Foreclosure type and deficiency judgment exposure

    Most buyers don’t discover these limits until escrow is already underway — which can trigger loan restructuring or contract amendments.

    Common Elements Buyers Should Review Carefully

    Regardless of whether a mortgage or deed of trust is used, buyers should understand these important documents:

    • Mortgage note or promissory note
    • Legal description of the property
    • Property’s legal title and equitable title
    • Trustee company or title company role
    • Foreclosure sale procedures
    • Terms of the mortgage or trust deed

    This blog post article is for informational purposes only and does not constitute legal advice. Buyers should consult their lender or a qualified real estate attorney for transaction-specific guidance.

    Bottom Line: Mortgage vs. Deed of Trust in Idaho

    • ≤ 40 acres → Deed of trust allowed
    • 41–80 acres (non-ag) → Deed of trust allowed
    • 41–80 acres (ag) → Mortgage required
    • Over 80 acres (any use) → Mortgage required

    Understanding “Mortgage vs. Deed of Trust“ early protects your timeline, financing strategy, and long-term legal rights.

    Build with clarity—before you commit.

    If you’re buying land, building on acreage, or navigating Idaho’s mortgage vs. deed-of-trust rules, remember: Sunrise Realty Group can bring clarity to your options before they become problems.

    We guide buyers throughland selection, financing considerations, and builder coordination so you can move forward with confidence—not surprises.


    👉 Talk with Sunrise Realty Group about your next step

    Mortgage vs deed of trust in Idaho explained. Learn how the 40-acre and 80-acre rules affect rural land, farms, and large acreage.
  • Energy-Efficient Design Tips for Idaho’s Climate

    Energy-Efficient Design Tips for Idaho’s Climate

    Designing a home that performs well in Idaho’s climate requires more than innovative materials—it requires strategy. Here are a few of our favorite energy-efficient design tips for Idaho’s climate.

    Because Idaho experiences hot summers, cold winters, low humidity, and dramatic temperature swings, the right energy-efficient design choices can make an enormous difference in comfort, durability, and long-term energy costs.

    Keep reading to learn more.

    Best Energy-Efficient Design Tips for Idaho’s Climate.

    Whether you’re planning a custom home, refining a semi-custom plan, or starting new construction on your land, these energy-efficient design tips for Idaho will help reduce energy consumption, and lower your utility bills, while creating a healthier, more resilient home.

    ⭐ 1. Orient the Home to Maximize Sunlight & Heat Control

    Home orientation is one of the most important elements of energy-efficient design in Idaho.

    Proper placement reduces summer heat gain, prevents winter heat loss, and supports passive homes and sustainable buildings.

    A few of the best practices include:

    • Positioning the main living areas on the south side for natural lighting and passive heat
    • Reducing large east/west windows to limit unwanted heat transfer
    • Using roof overhangs to block high summer sun but welcome winter sun
    • Designing rooflines that allow for future solar panels or solar power systems

    Good orientation is a cost-effective solution that reduces energy usage from day one.

    ⭐ 2. Choose High-Performance Windows for Extreme Temperature Swings

    Idaho’s winters can drop below zero while summers push toward triple digits—meaning windows play a major role in heat loss, heat gain, and overall energy waste.

    You’ll want to look for windows that provide:

    • Double or triple panes
    • Low-E coatings to reduce heat transfer
    • Argon or krypton gas insulation
    • Fiberglass or vinyl frames
    • High SHGC on south-facing windows
    • Low SHGC on west-facing windows

    Better windows improve indoor air quality, reduce energy consumption, and contribute to potential energy savings in both the short and long run.

    ⭐ 3. Upgrade Insulation—Especially in Attics, Walls & Crawl Spaces

    Insulation remains one of the best ways to improve your home’s energy efficiency. Idaho building codes set minimums, but optimal performance usually requires more—especially in new homes built for long-term performance.

    Recommended levels:

    • R-49 to R-60 in the attic
    • R-21 or higher in exterior walls
    • Insulated basement or conditioned crawl space foundations
    • Robust air sealing around penetrations to reduce air leakage

    Stronger insulation minimizes heat loss, lowers operating costs, and keeps your home comfortable year-round.

    ⭐ 4. Select an HVAC System Designed for Idaho’s Climate

    HVAC is a critical part of both energy conservation and building performance.

    Because Idaho has diverse elevations and microclimates, you should tailor your system to your location and heating needs.

    Efficient options include:

    • High-efficiency gas furnaces (95%+)
    • Air-source heat pumps
    • Cold-climate heat pumps for foothills and mountain areas
    • Dual-fuel systems combining gas and heat pump technology
    • Ductless mini-splits for ADUs, shops, or bonus rooms

    An appropriately sized HVAC system reduces energy waste and prevents structural damage caused by moisture or poor ventilation.

    ⭐ 5. Focus on a Tight, High-Quality Building Envelope

    Your building envelope—walls, roof, insulation, and air barriers—has a bigger impact on energy-efficient design in Idaho than many people realize.

    Key components:

    • Complete air sealing around windows, outlets, and gaps
    • Continuous vapor barriers
    • Advanced framing techniques
    • Weather-resistant barriers
    • Insulated rim joists & headers

    A tight envelope prevents heat loss, keeps outside air from entering, and reduces the workload on your heating and cooling systems.

    ⭐ 6. Incorporate Shading, Covered Patios & Smart Landscaping

    Solar heat gain increases energy use in the summer months. Thoughtful shading helps balance your home’s temperature and reduce cooling system demand.

    Effective shading ideas:

    • Covered patios
    • Deep overhangs
    • Pergolas
    • Exterior sunshades
    • Strategically placed trees
    • Solar lights for outdoor efficiency

    Shading helps reduce cooling costs and improves home comfort.

    ⭐ 7. Choose Energy-Efficient Appliances & Lighting

    Once your home’s structure is energy-efficient, your daily energy consumption comes from appliances, lighting, and water usage.

    Smart choices include:

    • ENERGY STAR appliances
    • LED lighting for lower energy use
    • Programmable thermostats like Nest or Ecobee
    • Water-saving fixtures to reduce water consumption
    • Heat pump water heaters (or alternatively, tankless water heaters)
    • Solar-powered exterior lights

    These upgrades reduce utility bills and support your long-term energy efficiency goals.

    ⭐ 8. Design Your Roof for Solar Power—Even If You Install Later

    Idaho is one of the best states in the United States for solar energy, thanks to high sunlight exposure and low humidity.

    To prepare for solar panels:

    • Include a large south-facing roof plane
    • Maintain minimal roof penetrations
    • Choose a pitch between 25° and 40°
    • Add conduit during construction for future wiring
    • Consider battery storage for renewable energy resilience

    Remember, strategic planning with your roof design now, offers flexibility and increased value for future generations later.

    ⭐ 9. Use Zoning in Your Floor Plan for Smarter Energy Use

    Zoning divides your home into areas that can heat or cool independently. Utilizing zoning reduces energy usage and prevents over-conditioning unused spaces.

    Standard zoning setups are designed to maximize comfort and efficiency in your home. They often include separate zones for bedrooms and living areas, ensuring each space maintains its ideal temperature.

    With most standard zoning, rooms over the garage typically have their own dedicated zone to account for unique heating and cooling needs. For multi-level homes, smart thermostats are a common feature, allowing for precise temperature control across floors. Basements or bonus rooms often require additional zoning to keep these spaces comfortable year-round.

    In other words, zoning helps maintain a comfortable, healthy home without unnecessary energy consumption. It’s one of the best energy-efficient design tips for Idaho’s climate we can give!

    ⭐ 10. Select Durable, Low-Maintenance Exterior Materials

    Idaho’s tough climate makes it essential to choose the right materials for sustainable design and long-term efficiency.

    Options like fiber cement siding, insulated exterior doors, and metal roofing can go a long way in boosting your home’s durability and reducing heat gain.

    High-R garage doors and stone veneer accents add thermal mass, making them smart picks for better energy performance.

    Using sustainable, weather-resistant materials is worth the investment; these materials improve efficiency and reduce repair costs, while helping your home withstand Idaho’s challenging conditions.

    ⭐ Final Thoughts

    Energy-efficient design isn’t just a trend that will fade over time—it’s a growing need in a state with dramatic temperature shifts and diverse elevations.

    Thinking of building here? With smart planning, better insulation, efficient systems, and sustainable materials, Idaho homeowners can enjoy:

    • Lower utility bills
    • Better indoor air quality
    • Higher home value
    • Reduced environmental impact
    • Long-term durability
    • Lower energy waste and improved comfort

    If you’re preparing to build or want help designing a high-performance home tailored to Idaho’s climate, Sunrise Realty Group is here with guidance, best practices, and a collaborative approach to creating homes that use less energy, but offer more comfort.

    Book a call today.

    Energy-efficient design in Idaho starts with smart orientation, insulation, windows, and HVAC. Learn how to build a resilient home
  • Custom Home vs. Semi-Custom vs. Production: What’s the Difference?

    Custom Home vs. Semi-Custom vs. Production: What’s the Difference?

    By Sunrise Realty Group

    If you’re thinking about building a new home in Idaho, one of the first big decisions you’ll face is which path to take in the custom vs semi-custom vs production home conversation.

    In other words: do you want a fully custom home designed from a blank slate, a semi-custom home based on an existing floor plan, or a production (spec) home built by a tract builder in a planned community?

    Each type of home offers a different level of design flexibility, cost, and involvement in the home-building process. Understanding those differences clearly can help you make an informed decision that better aligns with your budget, timeline, and your family’s needs.

    This guide breaks down each type of home in clear, simple terms—so you can decide which option is the best fit for your lifestyle and long-term goals in the Treasure Valley.

    What Is a Production Home?

    A production home is the simplest and most affordable type of new construction. Production homes are typically built by tract builders (CBH Homes, Hubble Homes, Lennar, etc.) who are large production home builders who work from a set of pre-designed floor plans in a subdivision or master-planned community.

    Instead of starting with a blank slate, you choose from a set of standard floor plans offered by the builder. This allows the builder to streamline the construction process, control costs, and deliver high-quality homes at lower prices with less time from contract to move-in.

    Key Features of a Production Home

    Production homes usually share several characteristics:

    • A set of floor plans or house plans to choose from
    • Pre-designed structural layouts with less flexibility for changes
    • Standard finishes with upgrade packages for things like countertops, flooring, or paint colors
    • A predictable construction process with defined stages and timelines
    • Often built on smaller or uniform lots within the same neighborhood
    • Energy efficiency measures are commonly included as part of the builder’s standard package

    Many production builds are also referred to as spec homes or spec houses, especially when the builder starts construction before a specific buyer is under contract.

    Who a Production Home Is Best Suited For

    A production house is often the right choice for a:

    • Home buyer with a strict budget who still wants a new home
    • Buyers who prefer a move-in-ready home with fewer decisions to make
    • Families that want to be in a specific subdivision, school district, or community with amenities
    • Buyer who values a streamlined path and doesn’t need a high level of personalization

    For many people, production homes are an attractive option because they offer a lower cost of entry into new home construction and a shorter amount of time between signing a contract and receiving the keys.

    Pros of a Production Home

    • Lower cost compared to custom and many semi-custom builds
    • The fastest build time of the three options
    • Fewer decisions, which means less design fatigue
    • Clear base price and upgrade options upfront

    Cons of a Production Home

    • Limited design flexibility and structural changes
    • Less control over specific design elements or special features
    • Many homes in the community may share similar home designs and exterior materials

    What Is a Semi-Custom Home?

    A semi-custom home sits in the middle of the custom vs semi-custom vs production home spectrum. It blends flexibility with structure, and it’s often the best route for buyers who want more personalization than a production home—but don’t need the complete freedom (or full cost) of a true custom home.

    With a semi-custom home, you usually start with an existing floor plan from a semi-custom builder and then adjust it to your specific needs.

    Key Features of a Semi-Custom Home

    Semi-custom builds typically include:

    • A library of pre-designed floor plans or house plans to start from
    • The ability to make layout changes, such as moving walls, adding a bedroom, or reconfiguring the kitchen
    • A wider range of design options for finishes, fixtures, and exterior materials
    • More involvement in the design process, especially in the design phase
    • A mid-range price point between production and fully custom homes

    You’ll work with a design team or semi-custom builder to ensure the home’s construction reflects your lifestyle, specific needs, and price range.

    Who a Semi-Custom Home Is Best For

    A semi-custom home is often the best fit for:

    • Buyers who want a more personalized home without going all-in on a fully custom build
    • Families who have specific ideas about layout and storage but don’t need complete control over every detail
    • People who want a smoother, more structured process than a full custom project, but more design freedom than production homes

    Pros of a Semi-Custom Home

    • Greater level of personalization than production homes
    • The ability to adapt an existing floor plan to your family’s needs
    • A clearer starting point for budget and timeline than a complete custom build
    • Often, a good “middle ground” for many home buyers

    Cons of a Semi-Custom Home

    • More decisions to make than with a production home
    • Significant changes or structural changes can add additional cost.
    • The build may still take more time than a production home, especially if you request many modifications.

    What Is a Custom Home?

    A custom home offers the highest level of customization—and the most design freedom—among the three options. Here, you’re not starting with a standard plan or existing floor plan; you’re working with a custom home builder or design-build team to create a fully custom home from the ground up.

    Custom home projects usually start with a blank slate: your land, your ideas, and a design team that helps shape them into a complete set of house plans.

    Key Features of a Custom Home

    With a whole custom home, you can expect:

    • A fully original floor plan and architectural style
    • Complete control over room sizes, layout, and overall square footage design
    • The chance to incorporate specific design elements, special features, and unique home concepts
    • Tailored solutions to your land, views, and topography—especially if you own land already
    • The ability to specify exterior materials, energy efficiency features, and final finishes

    Custom home building is ideal for buyers who want their dream home to reflect a clear vision and specific needs that standard plans can’t meet.

    Who a Custom Home Is Best For

    A true custom home is often the right choice when:

    • You already own land or want to choose the land first and design around it.
    • You have detailed ideas about layout, architectural style, and special features.
    • You’re comfortable with a longer design-build process and a higher overall budget.
    • You want a one-of-a-kind home that doesn’t look like anything else in your neighborhood.

    Pros of a Custom Home

    • Complete control over the design process and final product
    • The highest level of personalization in layout, finishes, and performance features
    • Optimized use of your land, views, and site conditions
    • Potential for higher long-term value when done well

    Cons of a Custom Home

    • Typically, the highest cost and most extensive price range
    • The amount of time from the first decision to move-in is usually the longest.
    • Requires close coordination between your custom builder, design team, and lender
    • More decisions and more complexity throughout the construction process

    Custom vs Semi-Custom vs Production Home: Side-by-Side Comparison

    When you line up custom vs semi custom vs production home options, the differences become clearer. Here’s a simplified way to think about them:

    FeatureProduction HomeSemi-Custom HomeCustom Home
    CostLowest base price / lower costMid-range, depends on changesHighest, widest price range
    Design FlexibilityLowest design flexibilityModerate level of customizationUnlimited design freedom
    TimelineFastest / less timeModerateLongest amount of time
    Floor PlansFixed set of floor plansPre-designed floor plans with modificationsFully original plans
    DecisionsFewer decisions to makeMore decisions, guided by builderMost decisions across all phases
    Best ForBudget-focused, move-in ready buyersBuyers wanting balance between cost & customizationBuyers wanting full control & unique design
    LandUsually builder-owned lotsOften can build on your own lotCommonly built on land you own or select

    This comparison can help you quickly see which path best suits your budget, timeline, and level of involvement.

    How to Choose the Right Type of Home (and Builder)

    When you’re deciding between custom vs semi-custom vs production home paths, it often helps to think in terms of:

    1. Budget and Price Range
      • If you need the lowest possible base price and a simpler path, production homes or spec homes can be an attractive option.
      • If you invest more in personalization, semi-custom builds, or full-custom homes, you can open up more possibilities.
    1. Level of Customization You Want
      • If you’re comfortable with a standard plan and a few design options, production builds may be the right route.
      • If you have specific needs for your family, a semi-custom home offers a good balance.
      • If you want complete control and a truly unique home, a fully custom build is the natural choice.
    1. Amount of Time and Involvement
      • Production homes tend to require less time and fewer decisions.
      • Semi-custom and custom houses involve more meetings, design decisions, and ongoing input, but also lead to a more personalized home.
    1. Land Situation
      • If you don’t own land and want a quick, streamlined path, production home builders with move-in-ready home options might be ideal.
      • If you already own land or want to select land first, a semi-custom builder or custom home builder can help you align the home design with your site.

    Working with the right builder is just as important as choosing the right type of home. Look for production builders, semi-custom builders, or custom builders with a track record of high-quality homes, clear communication, and expert guidance through the design-build process.

    Next Steps in Your Home Building Journey

    Choosing between custom vs semi-custom vs production home options is one of the first—and most important—decisions in the home construction journey. 

    There’s no single “right decision” that applies to everyone; instead, the best fit depends on your:

    • Budget and long-term goals
    • Desired level of design freedom
    • Willingness to be involved in the design process
    • Timeline for moving into your new home

    Idaho’s growing market offers all three paths, from production homes in master-planned communities to semi-custom builds and full custom home design on acreage or view lots.


    If you’d like expert guidance on which type of builder and which type of home is the best route for your situation, Sunrise Realty Group can help you sort through your options, clarify your priorities, and move confidently toward the home of your dreams.

    Contact us now.

    Differences between a custom vs semi custom vs production home; choose the right builder, budget, and design path for your new home in Idaho.